
Building a NextJS blog with Obsidian as CMS
I've been frustrated with the current state of blogging tools for a while now. Inevitably, as a blogger, you are forced to either choose simplicity and give up control (e.g. Medium, Substack) or choose control and wrestle with unnecessary friction like managing servers, writing in plain markdown or learning templating languages.
What do I mean by control? It is primarily 3 things:
- Being able to control your blog front end completely.
- Storing your data as plain text files anywhere you want and being able to download and move them anywhere easily
- Being able to write in any editor you want without the need for internet access and easily publish in very few clicks.
It sounds simple, but incredibly this hasn't really existed for a long time. I've tried Medium, Substack, Wordpress, Ghost, Github Pages but while each might check 1 or 2 boxes, none of them hit all 3.
That is, until now. I think I've finally found a set up that does, in fact, check all 3 boxes. Here's how I did it.
High Level Architecture
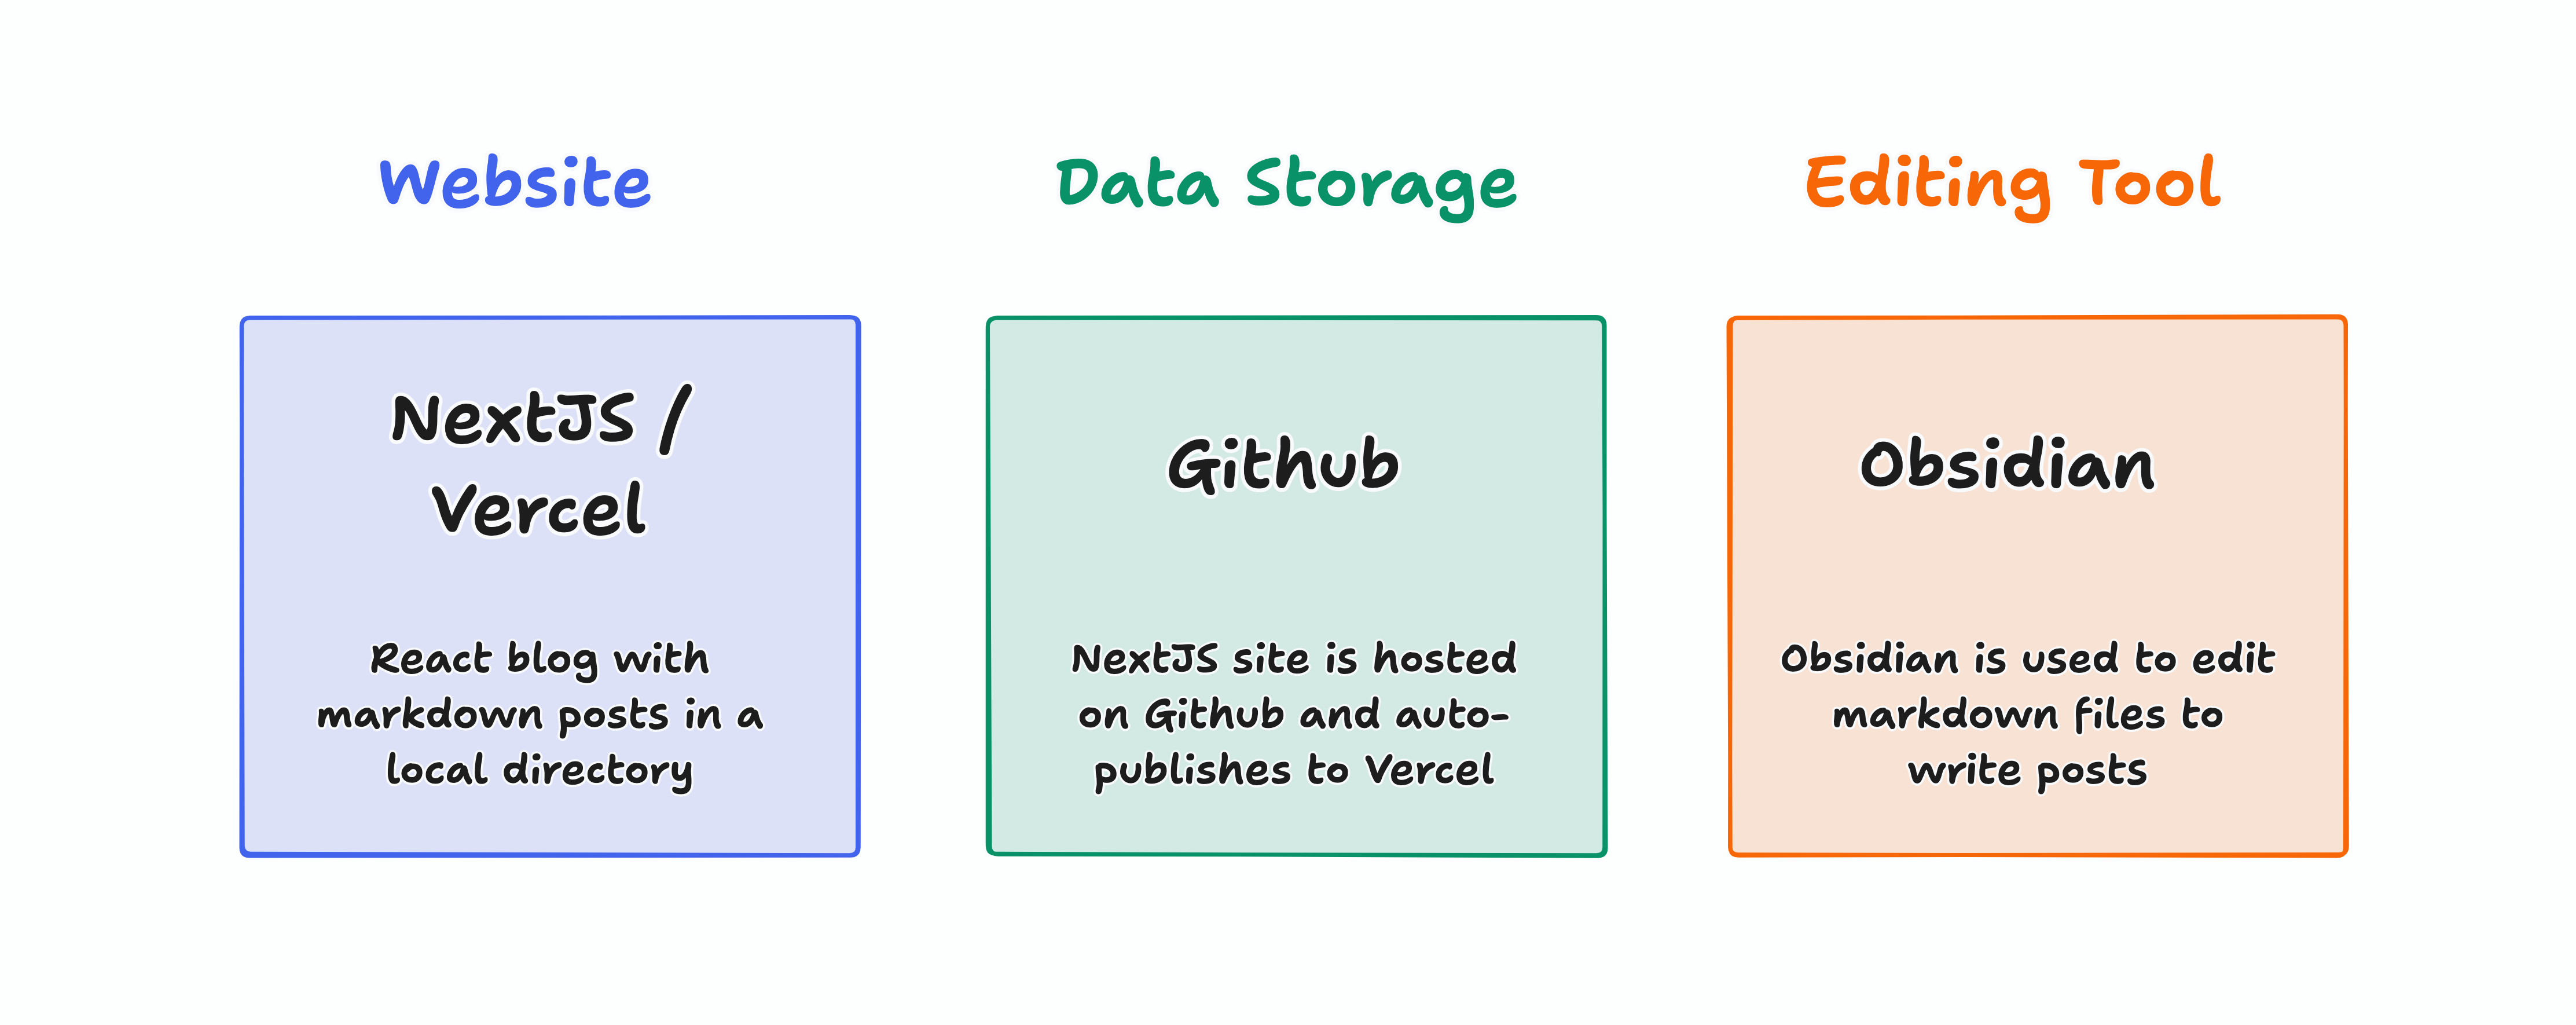
I decided I would build a NextJS blog, with my posts as simple markdown files all stored within my code repo. The content and code would both live on Github and my site would be deployed for free on Vercel. Writing content can be done either directly in markdown on Visual Studio Code, or using a WYSIWYG markdown editor like Obsidian, which I've really started to enjoy. Obsidian lets you edit markdown with a live preview and most importantly lets you easily paste images into a document while auto-inserting image links in the markdown.
Setting Up The Blog
Ok, enough chit chat. Let's build this blog together, step by step. At a high level, we'll go through the following steps:
- Create NextJS Blog
- Publish the blog online
- Set up Obsidian for editing posts
Setting Up The Bare Bones NextJS Blog
This section assumes you have a little experience with React and NextJS. If not, you can go through the NextJS getting started tutorial, which walks you through building a very simple markdown blog. I used that project, almost as-is, for my blog, with minor modifications to handle Obsidian's syntax for links and to enable code highlighting. We'll look at those later.
You can download the NextJS blog starter project directly here.
First, open up the NextJS blog starter in an editor and review the following files.
- The
posts/directory contains markdown posts as.mdfiles - The
public/imagesdirectory is where images you add to your posts need to live. When writing writing in markdown, you would add images in that directory and insert them into your posts by providing a file path like this:
To run the blog locally:
npm install
npm run dev
That should host the blog at http://localhost:3000. You can now make some changes to pages/index.js to add your own name or update the styling. You can also try editing the markdown files in posts/ and see how the blog posts change on the site.
Try adding links and images to the posts. To add a link, add this syntax, to a post.
[Click here](https://google.com)
And to add images, first copy an image into the public/images directory and then add this to a post:

When you're done, upload the blog to Github and publish it to a static site host like Vercel (or Netlify). And your site is live!
Setting up Obsidian for Markdown Editing
Install Obsidian. When you open it, it will prompt you to create a vault for your data. Choose to open an existing folder as a vault and select the root folder of your NextJS project. This will open your entire code base as an Obsidian folder and will create a .obsidian folder in your project root.
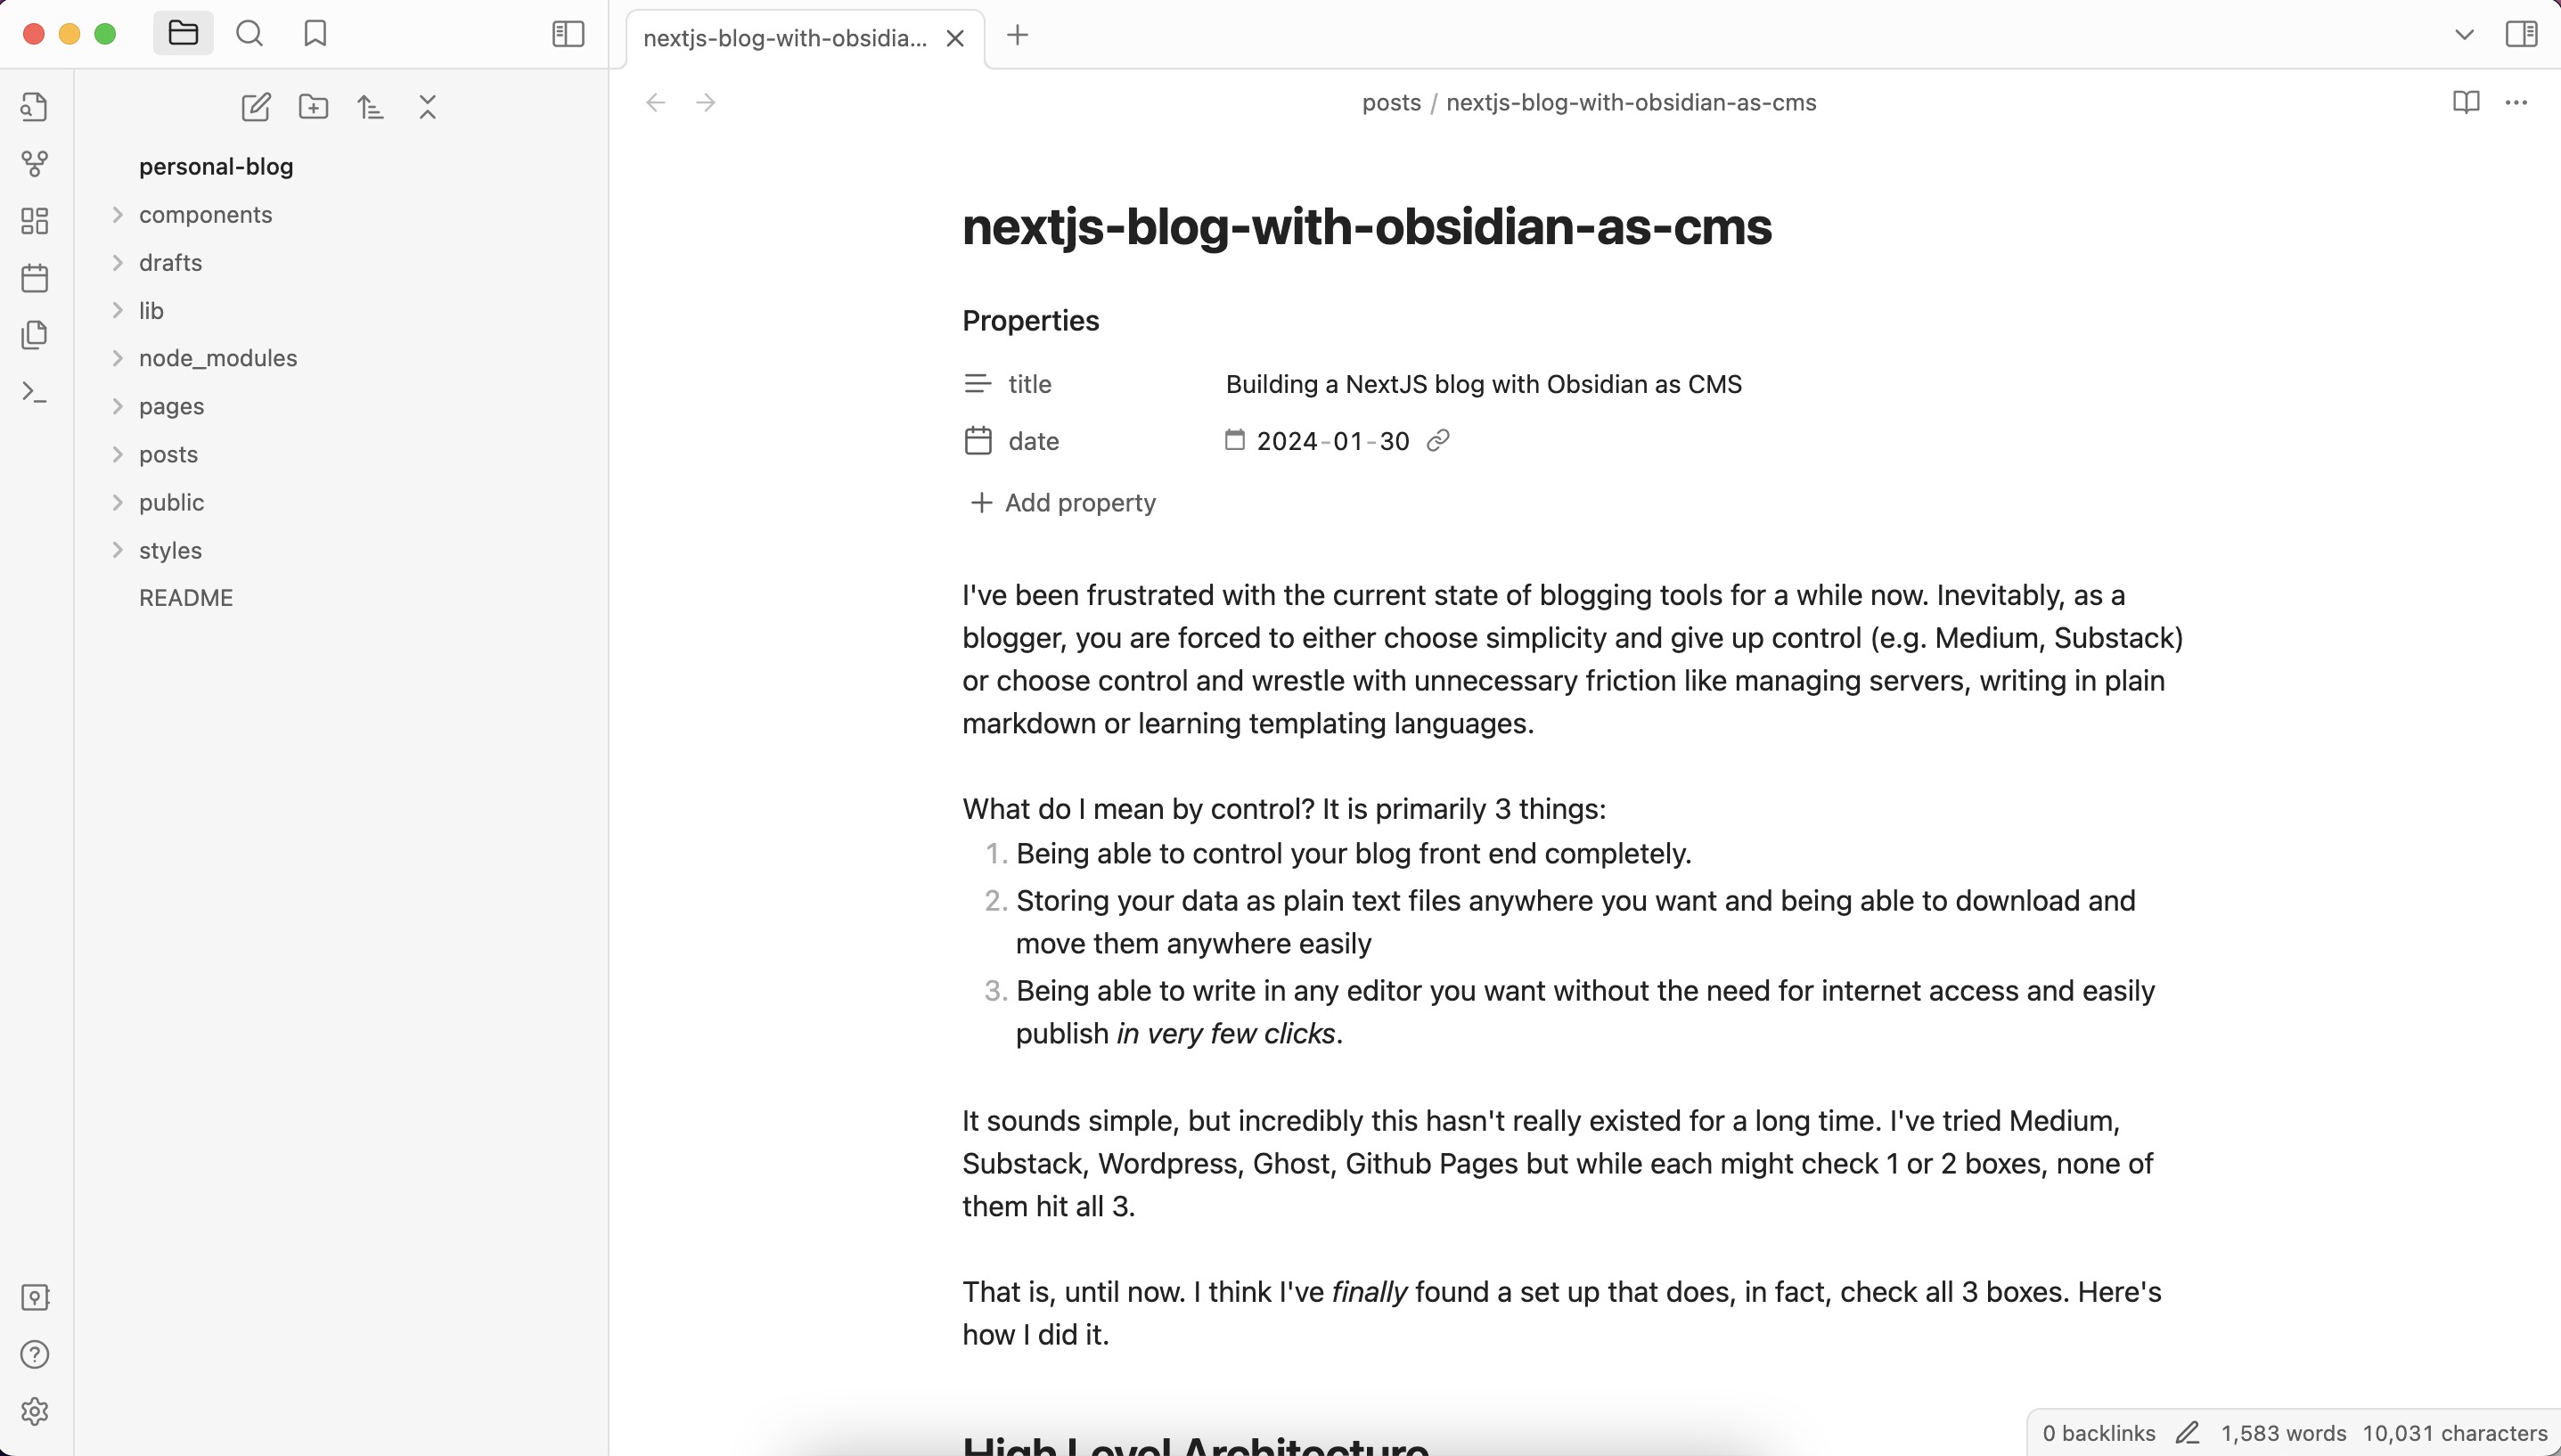
You can now open up any markdown post in posts/ and edit it using Obsidian's editor. You can also directly paste images into the document and a markdown image link will be created for you.
However, you will notice a few differences from standard markdown.
First, links created in Obsidian look different. Specifically, links to external sites look the same but internal links to other posts look different because they are wikilinks. For example:
[ [ name_of_post ] ]
Automatically inserted images also have a different syntax like this:
! [ [ image_file_name ] ]
You'll also notice that when you edit the frontmatter in your markdown files in Obsidian, it removes the quotes around the values. So this:
title: 'A rant about AI writing co-pilots'
date: '2023-06-11'
Becomes:
title: A rant about AI writing co-pilots
date: 2023-06-11
Finally, you'll notice that images you paste into the document get saved into the same directory as your posts - i.e. posts/ and not where they should be according to NextJS i.e. the public/images directory. All these issues will cause NextJS to throw errors when rendering the post, but we will fix all of it in a minute.
Now let's modify some Obsidian settings. Click the gear icon on the bottom left and open Settings.
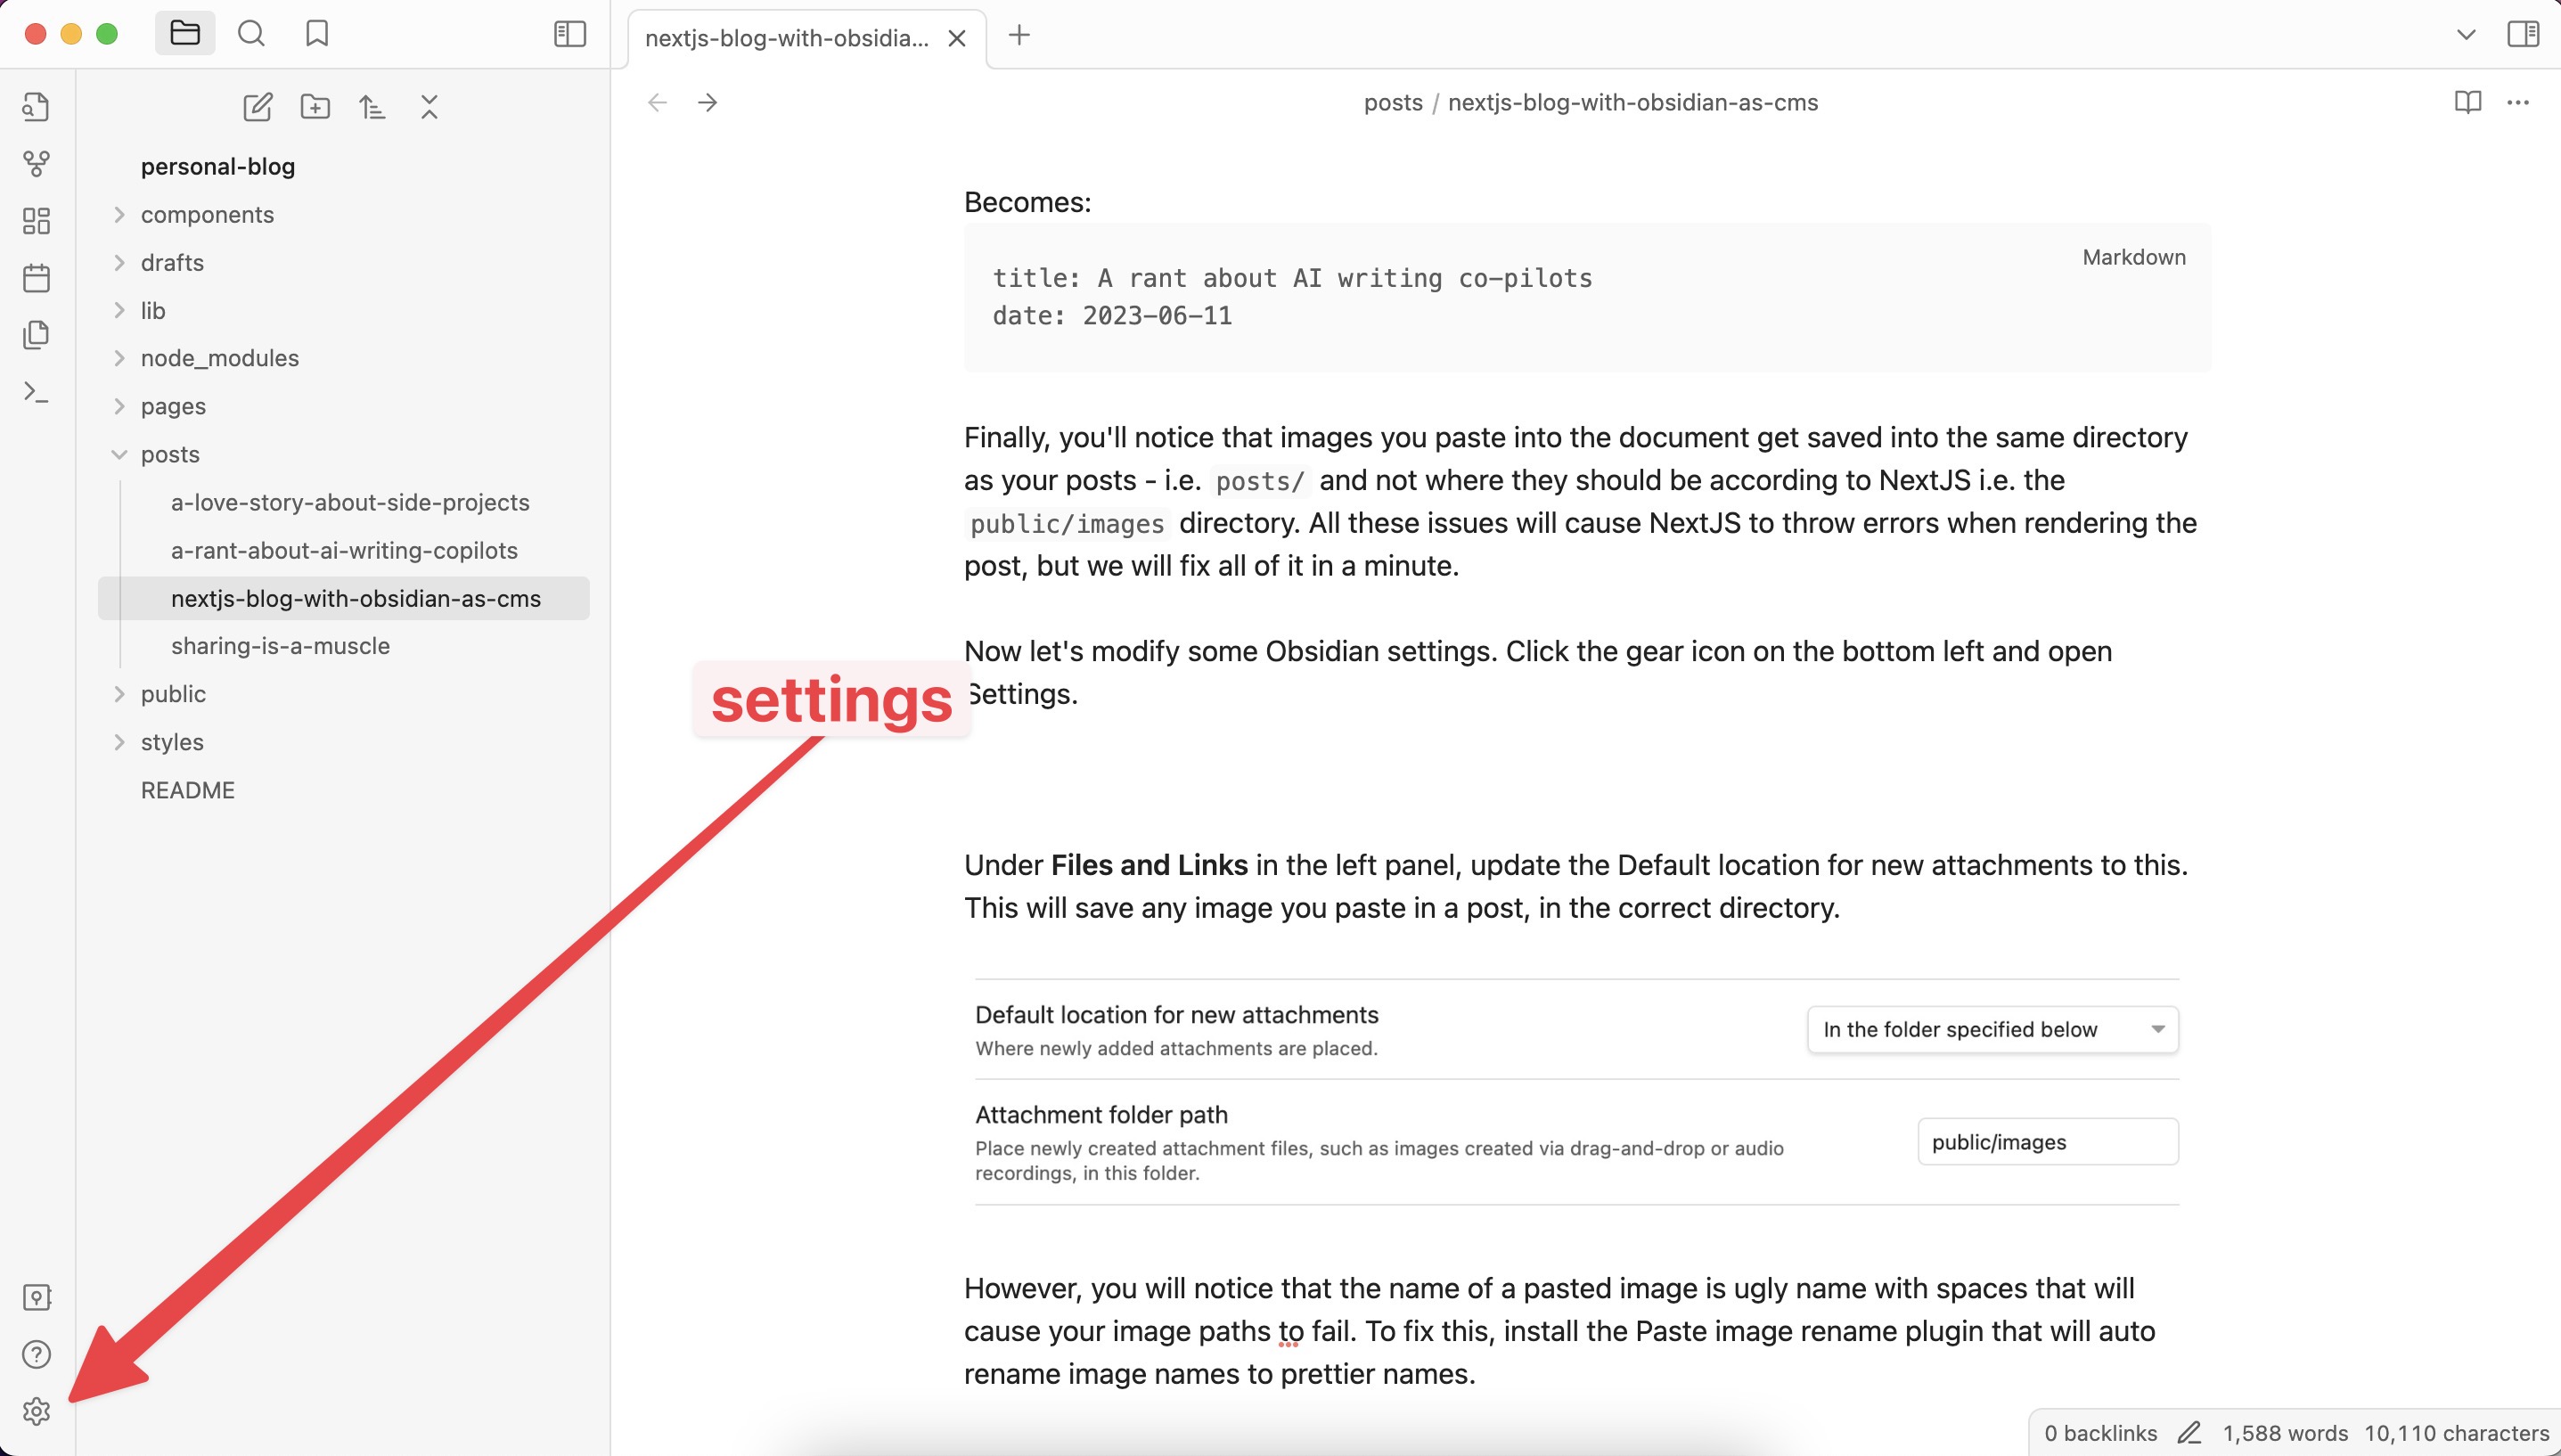
Under Files and Links in the left panel, update the Default location for new attachments to this. This will save any image you paste in a post, in the correct directory.

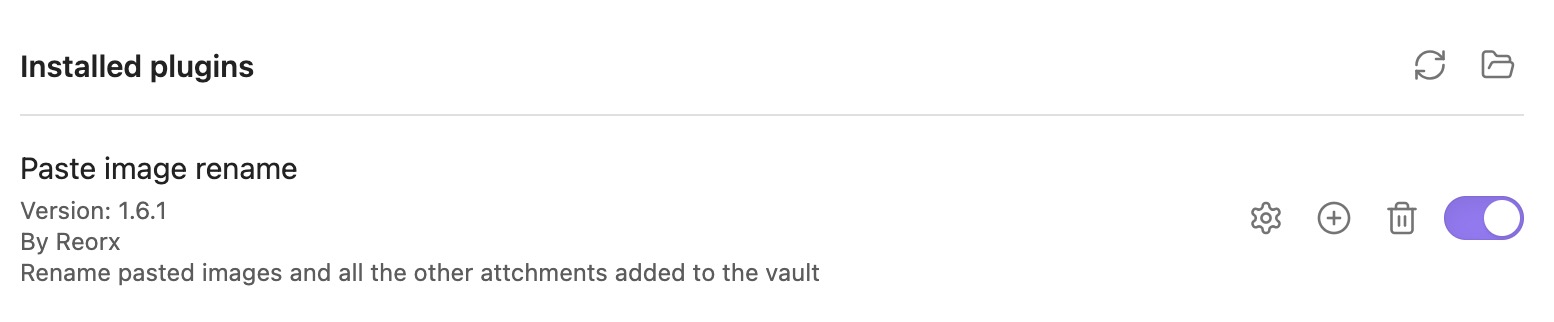
However, you will notice that the name of any pasted image is an ugly name with spaces that will cause your image paths to fail. To fix this, install the Paste image rename plugin that will help you auto rename image names to prettier names.
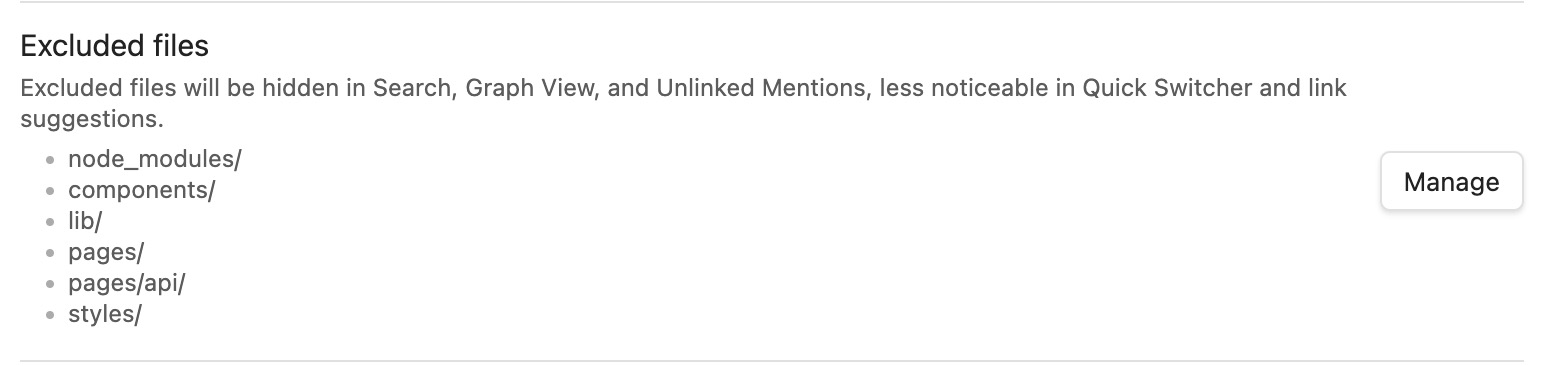
Optionally, you can exclude some of your code files from being visible in Obsidian. That way there is no risk of accidentally messing your code up while writing posts in Obsidian. It's purely optional. Here's my setup
Ok. Obsidian is ready for our blog. Now let's make some final changes to our NextJS Blog, so it plays well with Obsidian.
Update NextJS Blog to Integrate with Obsidian
You can now review the modifications I made to the original NextJS blog starter, by comparing my version with the original.
You can download my blog project here.
If you explore the files in both projects, you'll see that posts.js under lib/ contains functions to read and parse markdown text from files in the directory. Under the pages/ directory, index.js is the home page and under pages/posts, [id].js is a dynamic page to render each post.
I primarily made 2 changes. The first was adding 2 functions to convert frontmatter formats, and links (text and image) from the Obsidian wikilink format to standard markdown link format.
They functions are just simple regular expressions to find and replace wikilinks with standard markdown links.
function frontMatterObsidianToMD(data) { let newData = data if (typeof newData.date !== 'string') { newData.date = newData.date.toISOString().split('T')[0]; } return newData } function contentObsidianToMD(content) { // Find text in double brackets let linkRegex = /\[\[([^\]]+)\]\]/g; let imageRegex = /!\[\[([^\]]+)\]\]/g; // Replace double brackets with single bracket links let replacedImagesText = content.replace(imageRegex, ''); let replacedLinksText = replacedImagesText.replace(linkRegex, '[$1]($1)'); return replacedLinksText }
The second change I made is optional. I wanted to allow code syntax highlighting with React Markdown. So instead of using the remark library in posts.js to convert markdown to html, I used React Markdown (which under the hood uses remark and Prism) to move the render html logic to the [id].js file.
You will need to install the following packages:
npm install react-markdown react-gfm react-syntax-highlighter
Then import these into your [id].js file.
import ReactMarkdown from 'react-markdown'
import remarkGfm from 'remark-gfm'
import { Prism as SyntaxHighlighter } from 'react-syntax-highlighter'
import { prism } from 'react-syntax-highlighter/dist/cjs/styles/prism'
Update this line in your JSX
<div dangerouslySetInnerHTML={{ __html: postData.content }} />
to this:
<ReactMarkdown
	remarkPlugins={[remarkGfm]}
	components={{
	code({node, inline, className, children, ...props}) {
		const match = /language-(\w+)/.exec(className || '')
		return !inline && match ? (
			<CodeBlock
			codestring={String(children).replace(/\n$/, '')}
			language={match[1]}
			/>
		) : (
		<code className={className} {...props}>
			{children}
		</code>
		)
	}
	}}>
	{postData.content}
</ReactMarkdown>
Add add a code block component to render the highlighted code:
const CodeBlock = ({ language, codestring }) => {
	return (
	<SyntaxHighlighter language={language} style={prism} PreTag="div">
	{codestring}
	</SyntaxHighlighter>
	)
}
And finally, import some prism styles in your app.js file here:
import "prismjs/themes/prism.css";
import "prismjs/plugins/line-numbers/prism-line-numbers.css";
Thats it! I hope that helps if you're trying to set up a simple blogging stack for your own use without needing to jump into closed platforms like Medium or Substack.
My blog right now runs in exactly the same way and I've open sourced all my code here. It's everything I've talked about above, in a ready to go project.
You can download my blog project here.
Cheers!
Footnotes:
PS: I tried originally building a NextJS blog with Notion as the CMS, but their block format and expiring image urls make the front end painful to build, and I don't really enjoy writing long form content in Notion.
Other options if you want to render Obsidian to Jekyll:
https://alexoliveira.cc/guide/jekyll-with-obsidian https://www.gatlin.io/content/how-i-use-obsidian-as-a-cms-for-my-website